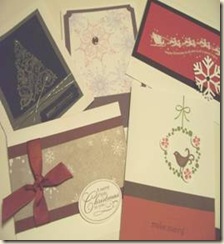
Here are the rest of my cards from my Stamp A Stack……


Thank you for looking today…
Here are the rest of my cards from my Stamp A Stack……
Thank you for looking today…
We had a lot of fun making all of our cards on Saturday. I ended up making 10 different cards and had a lot of fun doing it. So here are some of them…..


I had my first craft fair and I tried to use up a lot of retired papers. I did not realize just how much I had!! And I still have a lot left!!


here are the individual pictures of each item

I made candy cane holders

I made “candle” pops (thank you Dawn)

Color me snowmen… lots of fun!!

snowman soup

embossed tiles

hot chocolate holders and tea holders

candy bar wrappers

M&M purses

peppermint patties

double gift box w/ candy

and more double gift boxes

fancy favor boxes full of chocolate

and binder clips……
It was a fun night!!
Where: Baldwin Academy of Dance
I will have more information and be able to answer questions if you can come out to the Holiday Open House at the Baldwin Academy of Dance on Sat November 28th at 6pm, following the Light Parade.
I hope to see you there!!


After we stamped the Medallion we used Basic Brown to stamp the center of the medallion and punched it out with the large circle punch and then layered it with dimensionals. The rhinestone brad in the center finished it off.

The inside of the card is a case (copy and share with everyone) from a great blog called craftdoc. She has some neat ideas on her blog! 
The design is so the card won’t be ripped apart when someone tries to get out the candy. The Basic Black cardstock is slipped under another piece of cardstock and it hides the opening of the treat cup so the candy can be poured out easily, it can also be refilled to regift it wanted.
This is the scrapbook page my stamp club will be making this month. The Perfect Plum cardstock is put on a piece of
8 1/2x11 Basic Black. I cut a strip of the designer series paper (dsp) called Cast-a –Spell and glued it down on the left side of the page.
The little skeleton with the doggie having him for a snack is a stamp set in the mini called Twick or Tweet. I sponged a little Pumpkin Pie ink around the skeleton to soften it up a little. The green dsp is also from Cast-a Spell. I finished it off with a couple of More Mustard brads. Love it!!

And the final project for my club is an adorable little box called a pillow box. This is made using a die from Stampin’ Up! called a Pillow Box die. Who would of guessed. The stamp set is called Pumpkin Patch and it is really cute and easy to use.
I will find some little goodie to put inside .
Thank you for checking all of this out, please leave me a comment or two and let me know what you think!!


I finally made a banner from the pennant die !!!
It was my daughter’s birthday and I wanted her to have a cool banner for her party. Her colors were purple, white and silver. I used whisper white, plum and cottage wall dsp. I used the sticky cuts letters and spelled her name out using the silver glitter. And to add some more bling… I used the ice rhinestone brads to top it off. I figured out how to hang it using the silver cord and it turned out pretty cute. She loved it!!! So of course I had to make her a card to match……………
I hope you get the idea.


These are some cards I made for my husband to have signed and give to a coworker wh


 to pick.
I used the Friendly Words jumbo wheel and the punch is called Heart to Heart. I used Pretty in Pink for the cardstock and the ink. The base of the card is Always Artichoke.
Thanks for looking....
 I used the new Razzleb
 erry textured cardstock and the crown from the Definitely Decorative catalog.


